Step-by-Step Guide to Creating and Assigning Custom Roles in BotMindsAI for Efficient User Management


Table of contents
Introduction
Role-based access control (RBAC) enables or restricts access to the creators or annotators to do specific tasks in the project based on permissions defined for various roles that are configured through the platform.
Admin can create custom roles and assign privileges to the users
Add a custom role
Create a custom role and assign users to perform tailored tasks,
Log in to the BotMindsAI platform.
Select the subscription you want to use.
Choose the project for which you want to create custom roles.
Click on the Studio button.
Go to Settings > Permissions
Click on + Role button
Enter the Role Name, Select Action for this role, and choose the required users to be part of this role.
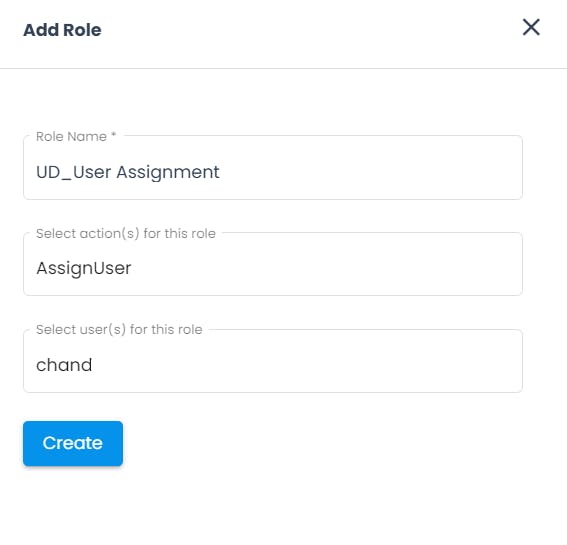
- Click Create
Feel free to experiment with other available roles i.e ViewOtherUserDocuments & AssignWorkflowStage
You've successfully created your first custom role on the BotMindsAI platform 🎉
User Creation
Let's look at how to onboard a new user to a specific role in the project,
Go to Settings > Users
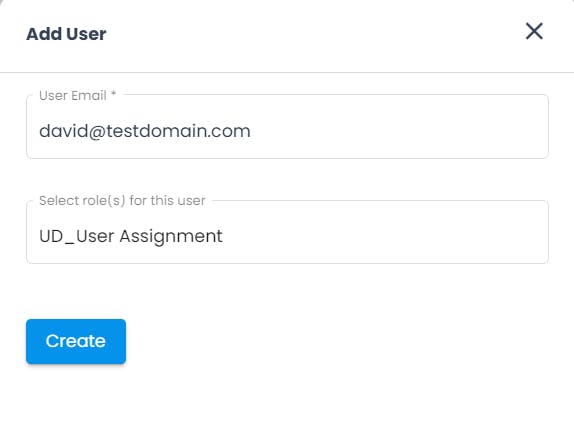
Click on the + User button
Enter User Email, Select the role(s) created in the above section and click Create
You have successfully onboarded a user with a custom role 🥁🥁🥁
Conclusion
Hopefully, you enjoyed learning how to create and assign custom roles on the BotMindsAI platform for efficient user management activities.